1. Connect to the charger interface from your device and login.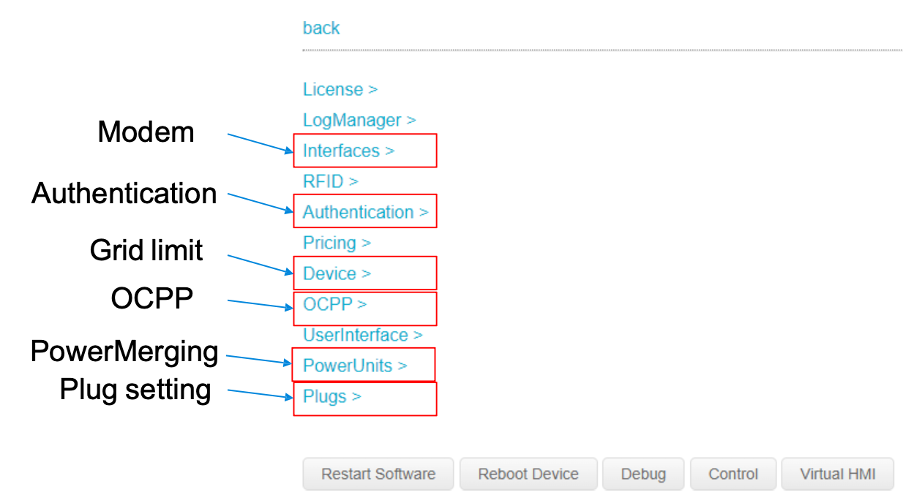
2. Navigate to OCPP from the main menu.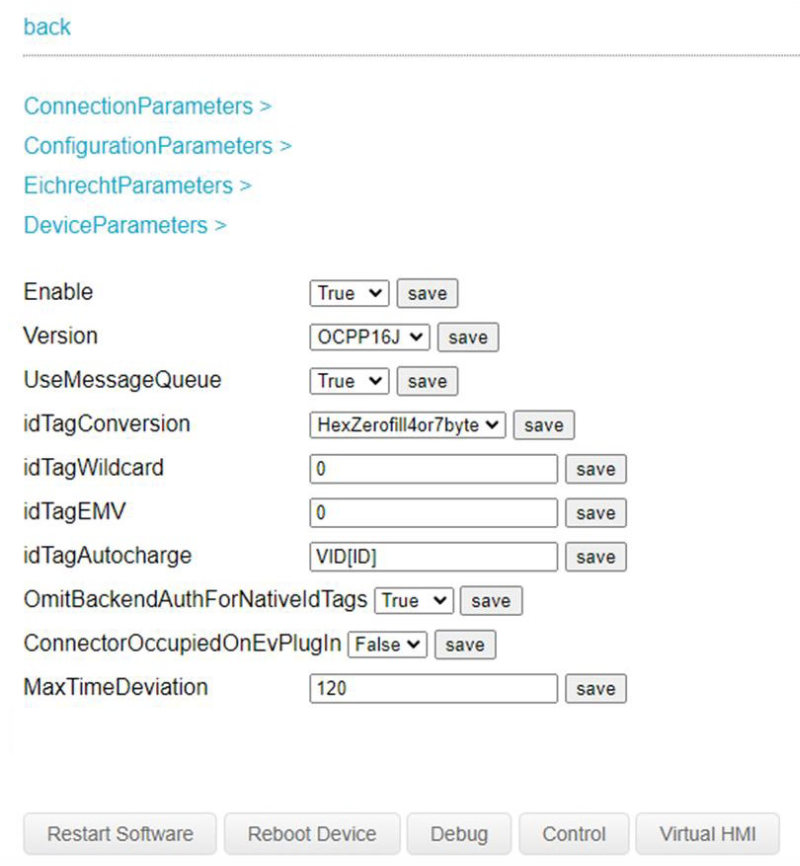
3. Set Enable to “True”. Click Save.
4. Set Version to “OCPP16J”. Click Save.
5. Navigate to ConnectionParameters from the OCPP settings.
8. Navigate to DeviceParameters from the OCPP settings.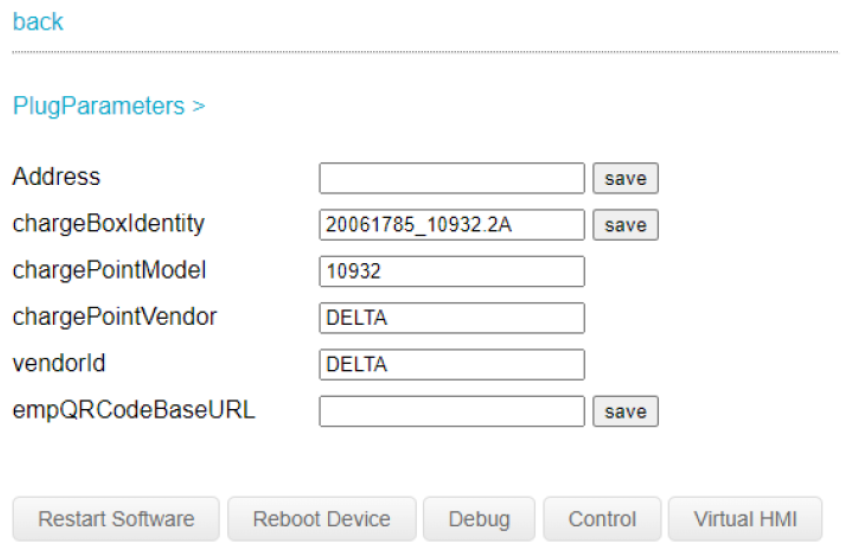
9. Set chargeBoxIdentity to your BoxID. Click Save.
10. Navigate to PlugParameters.
11. Assign a connector ID to each plug according to the charger tech specifications. Save each one.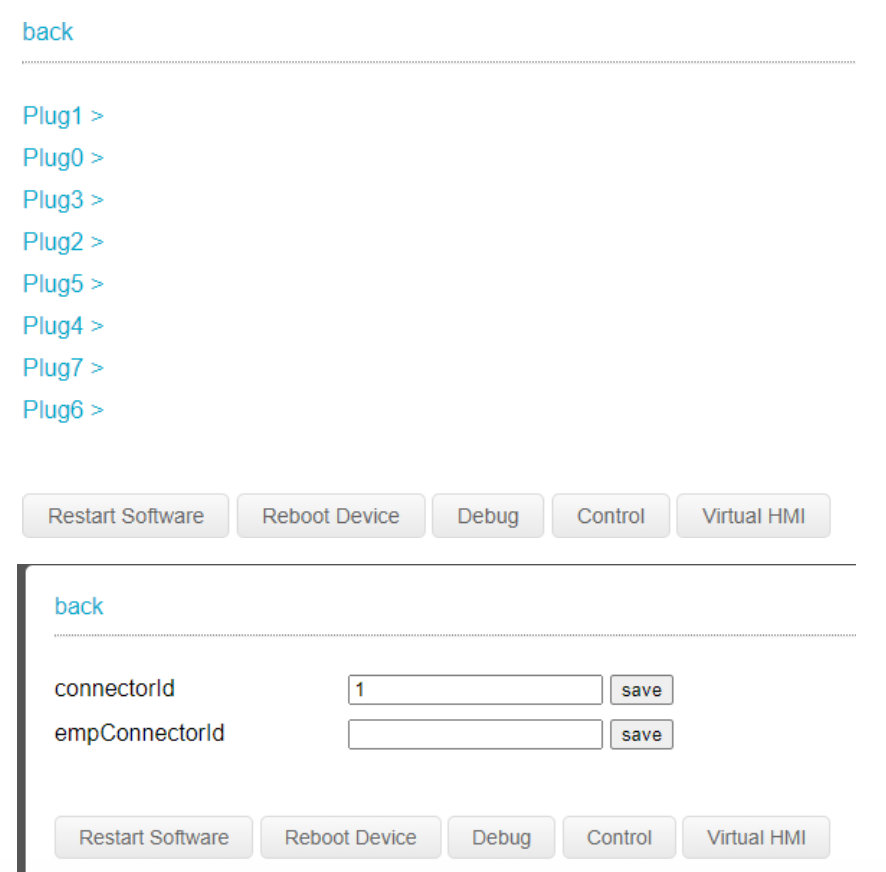
11. Go back to the main menu and navigate to Authentication.
12. Set AuthorizationMaster to “OCPP”. Click Save.
13. Click on AllowedAuthMethods and set RFID to “True”. Click Save.
14. The other values can be left false, but if you have a payment terminal on your charger and need help configuring it, please reach out to us.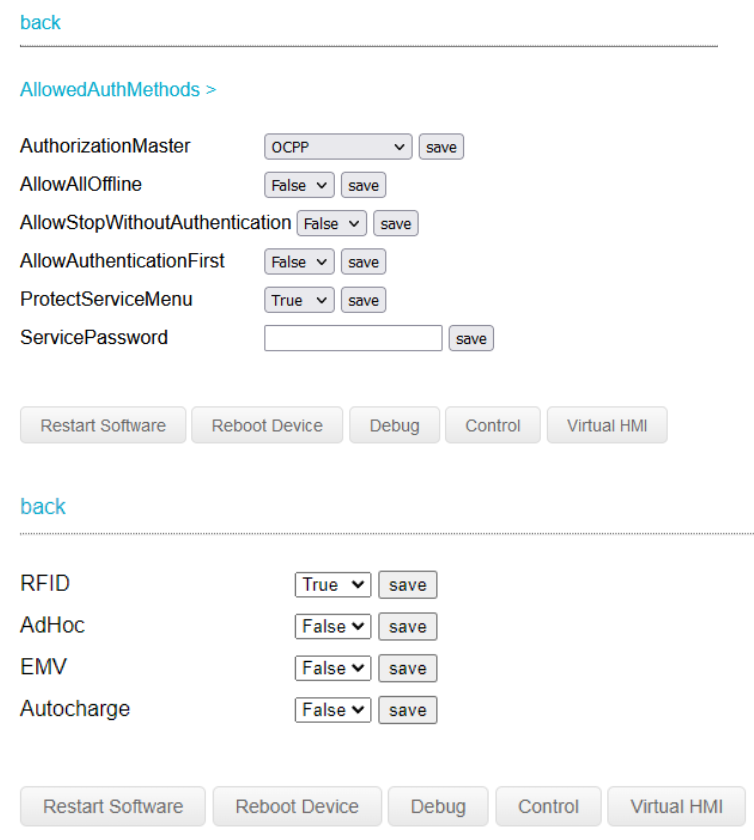
15. Go back to the main menu and click Reboot Device.


