Myenergi
Make sure your charger is connected to WiFi.
Setup is done via the myenergi website, which sends the OCPP configuration directly to your charger. Your charger needs to be online — make sure it's connected to your home WiFi before you start.
Go to your myenergi myaccount.
Open a web browser and go to https://myaccount.myenergi.com. Sign in with your myenergi credentials, or create an account if you haven't already.
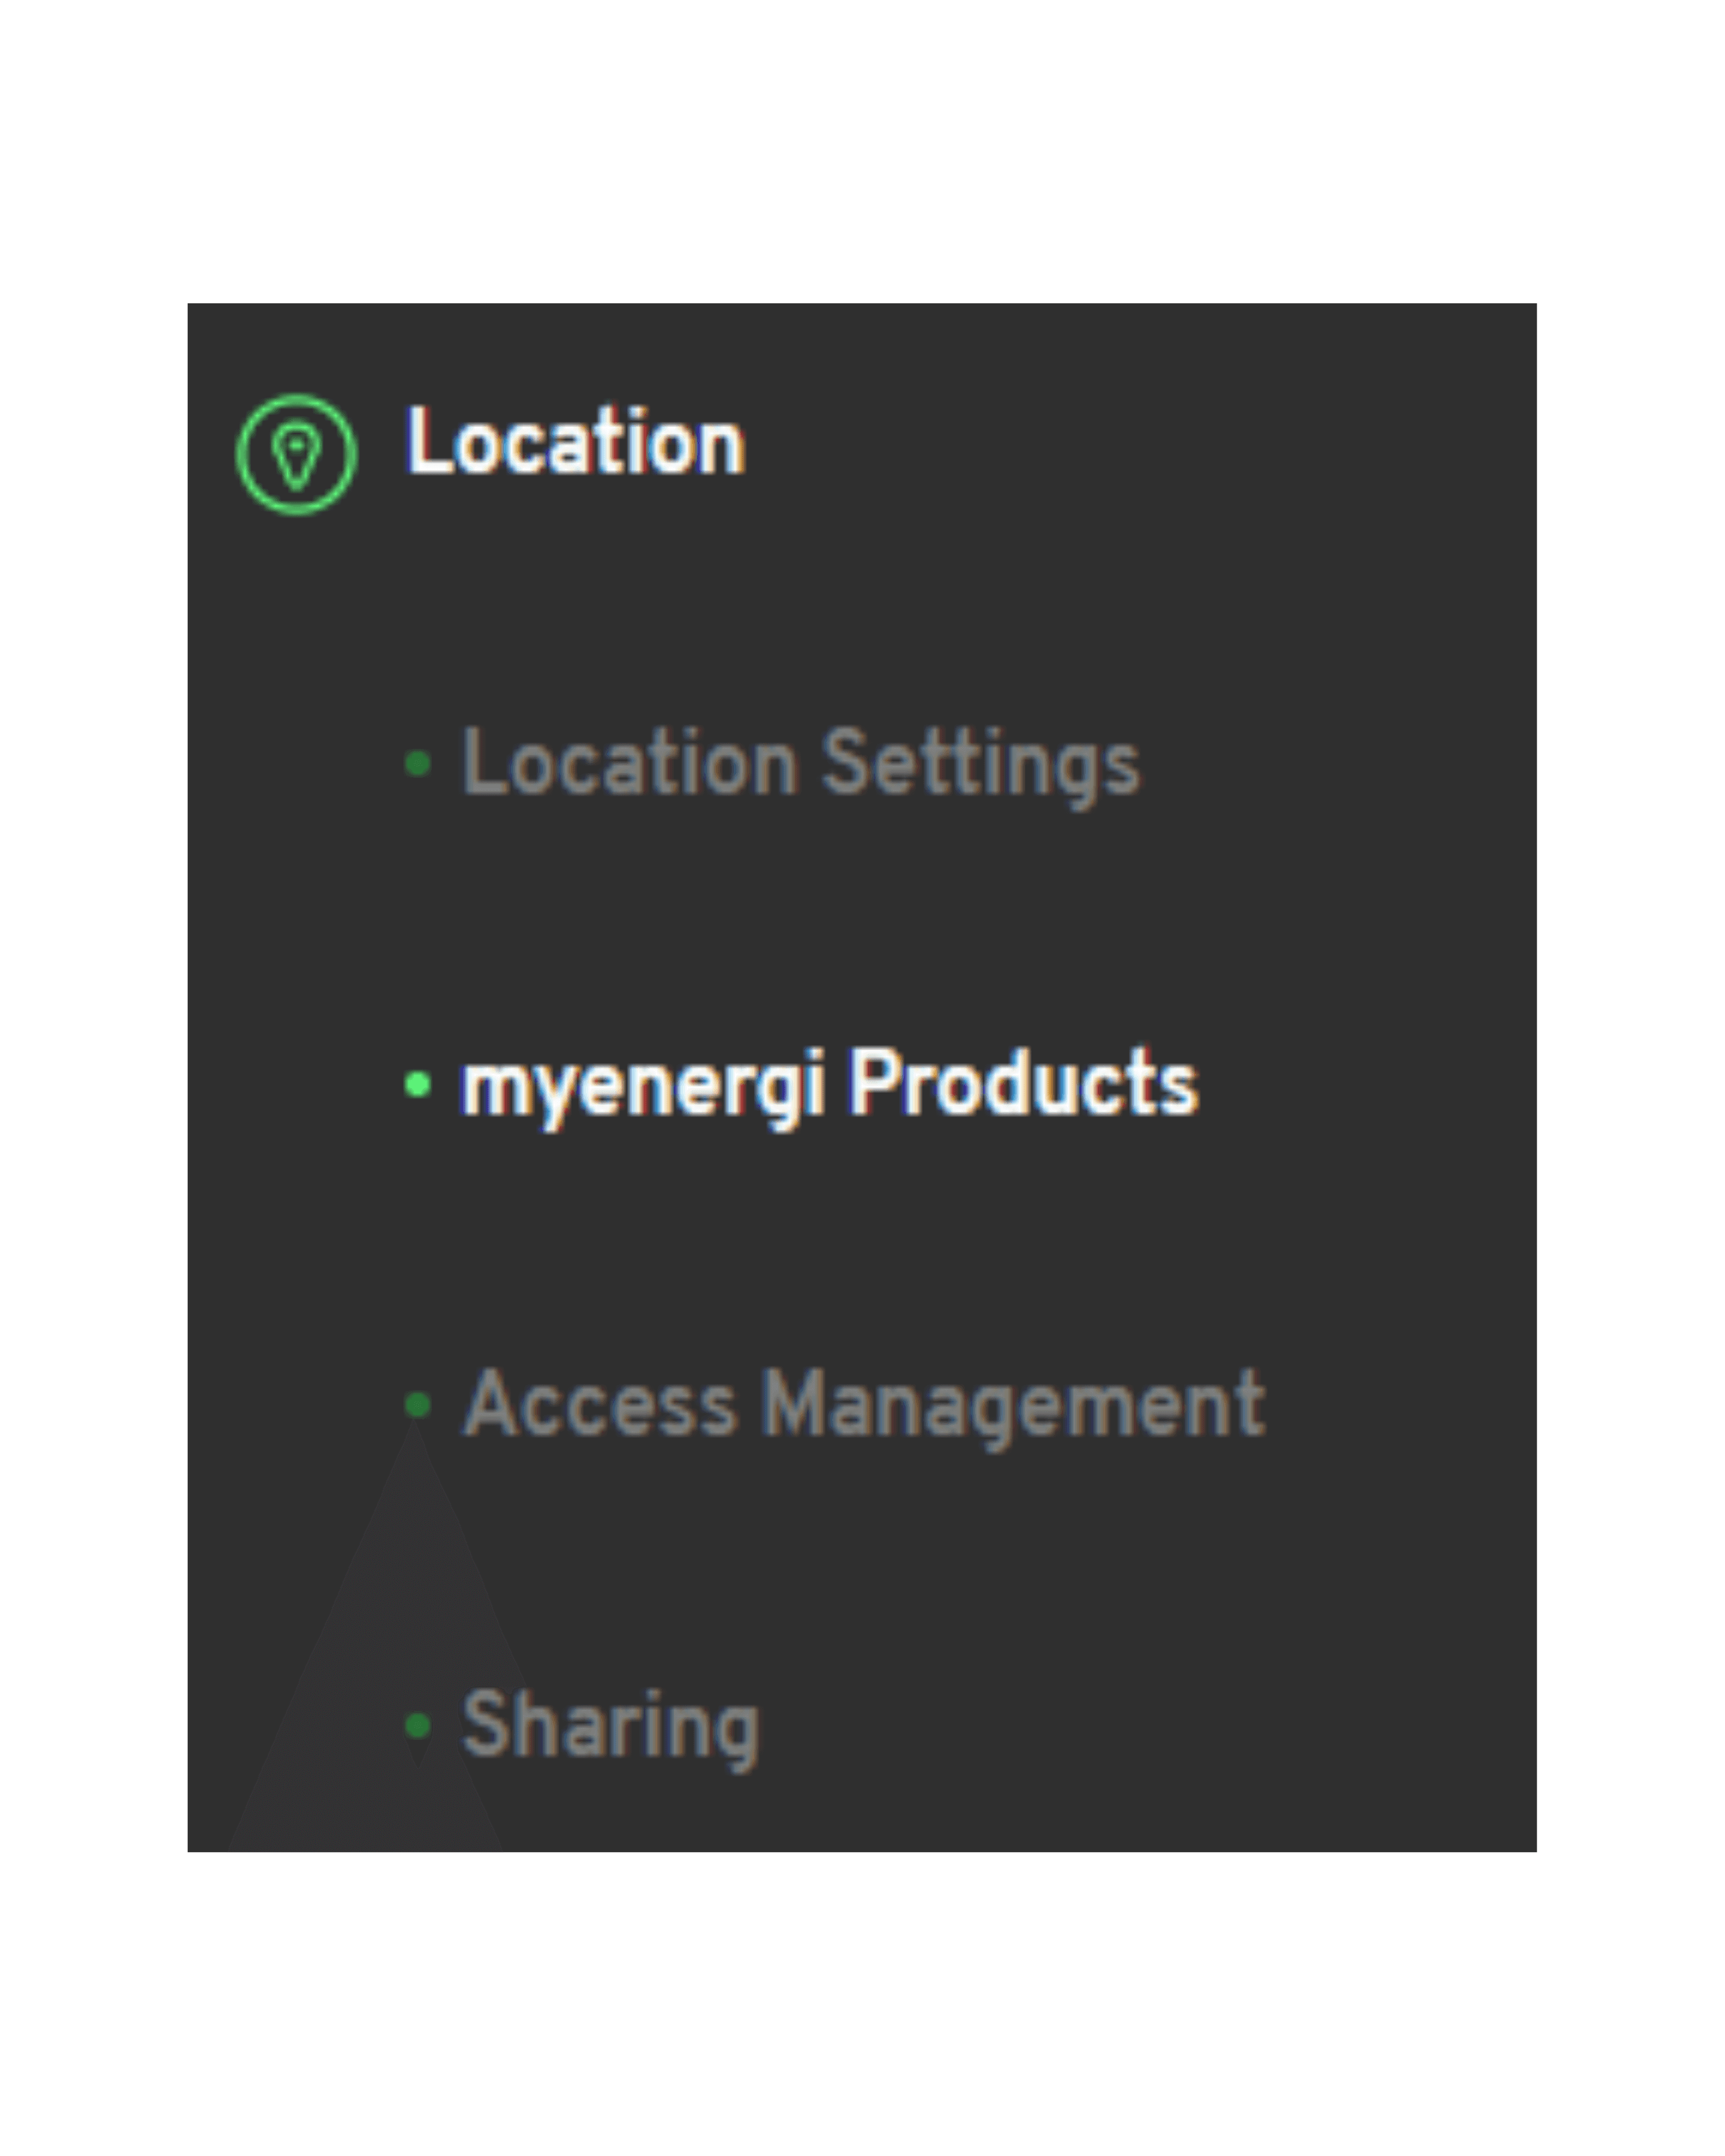
Click the location tab, then myenergi products.
On the sidebar, click on the location tab, then click myenergi products.
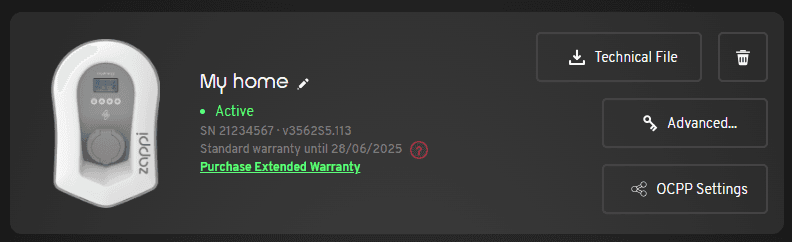
Find your charger and select OCPP settings.
Find the charger you wish to connect and select OCPP settings. If you don't see an OCPP settings option, your charger model doesn't support OCPP.
Select Manual / Other and accept T&Cs.
Select "Manual / Other" to enter custom OCPP service provider details. If this is your first time enabling OCPP, you'll need to accept the Terms & Conditions before proceeding.
Copy the Splash URL below.
wss://cpms.splashrenewable.co.uk/
Paste the URL in the Backend URL field.
Leave ChargeboxID as default (your serial number). For Username, use your serial number.
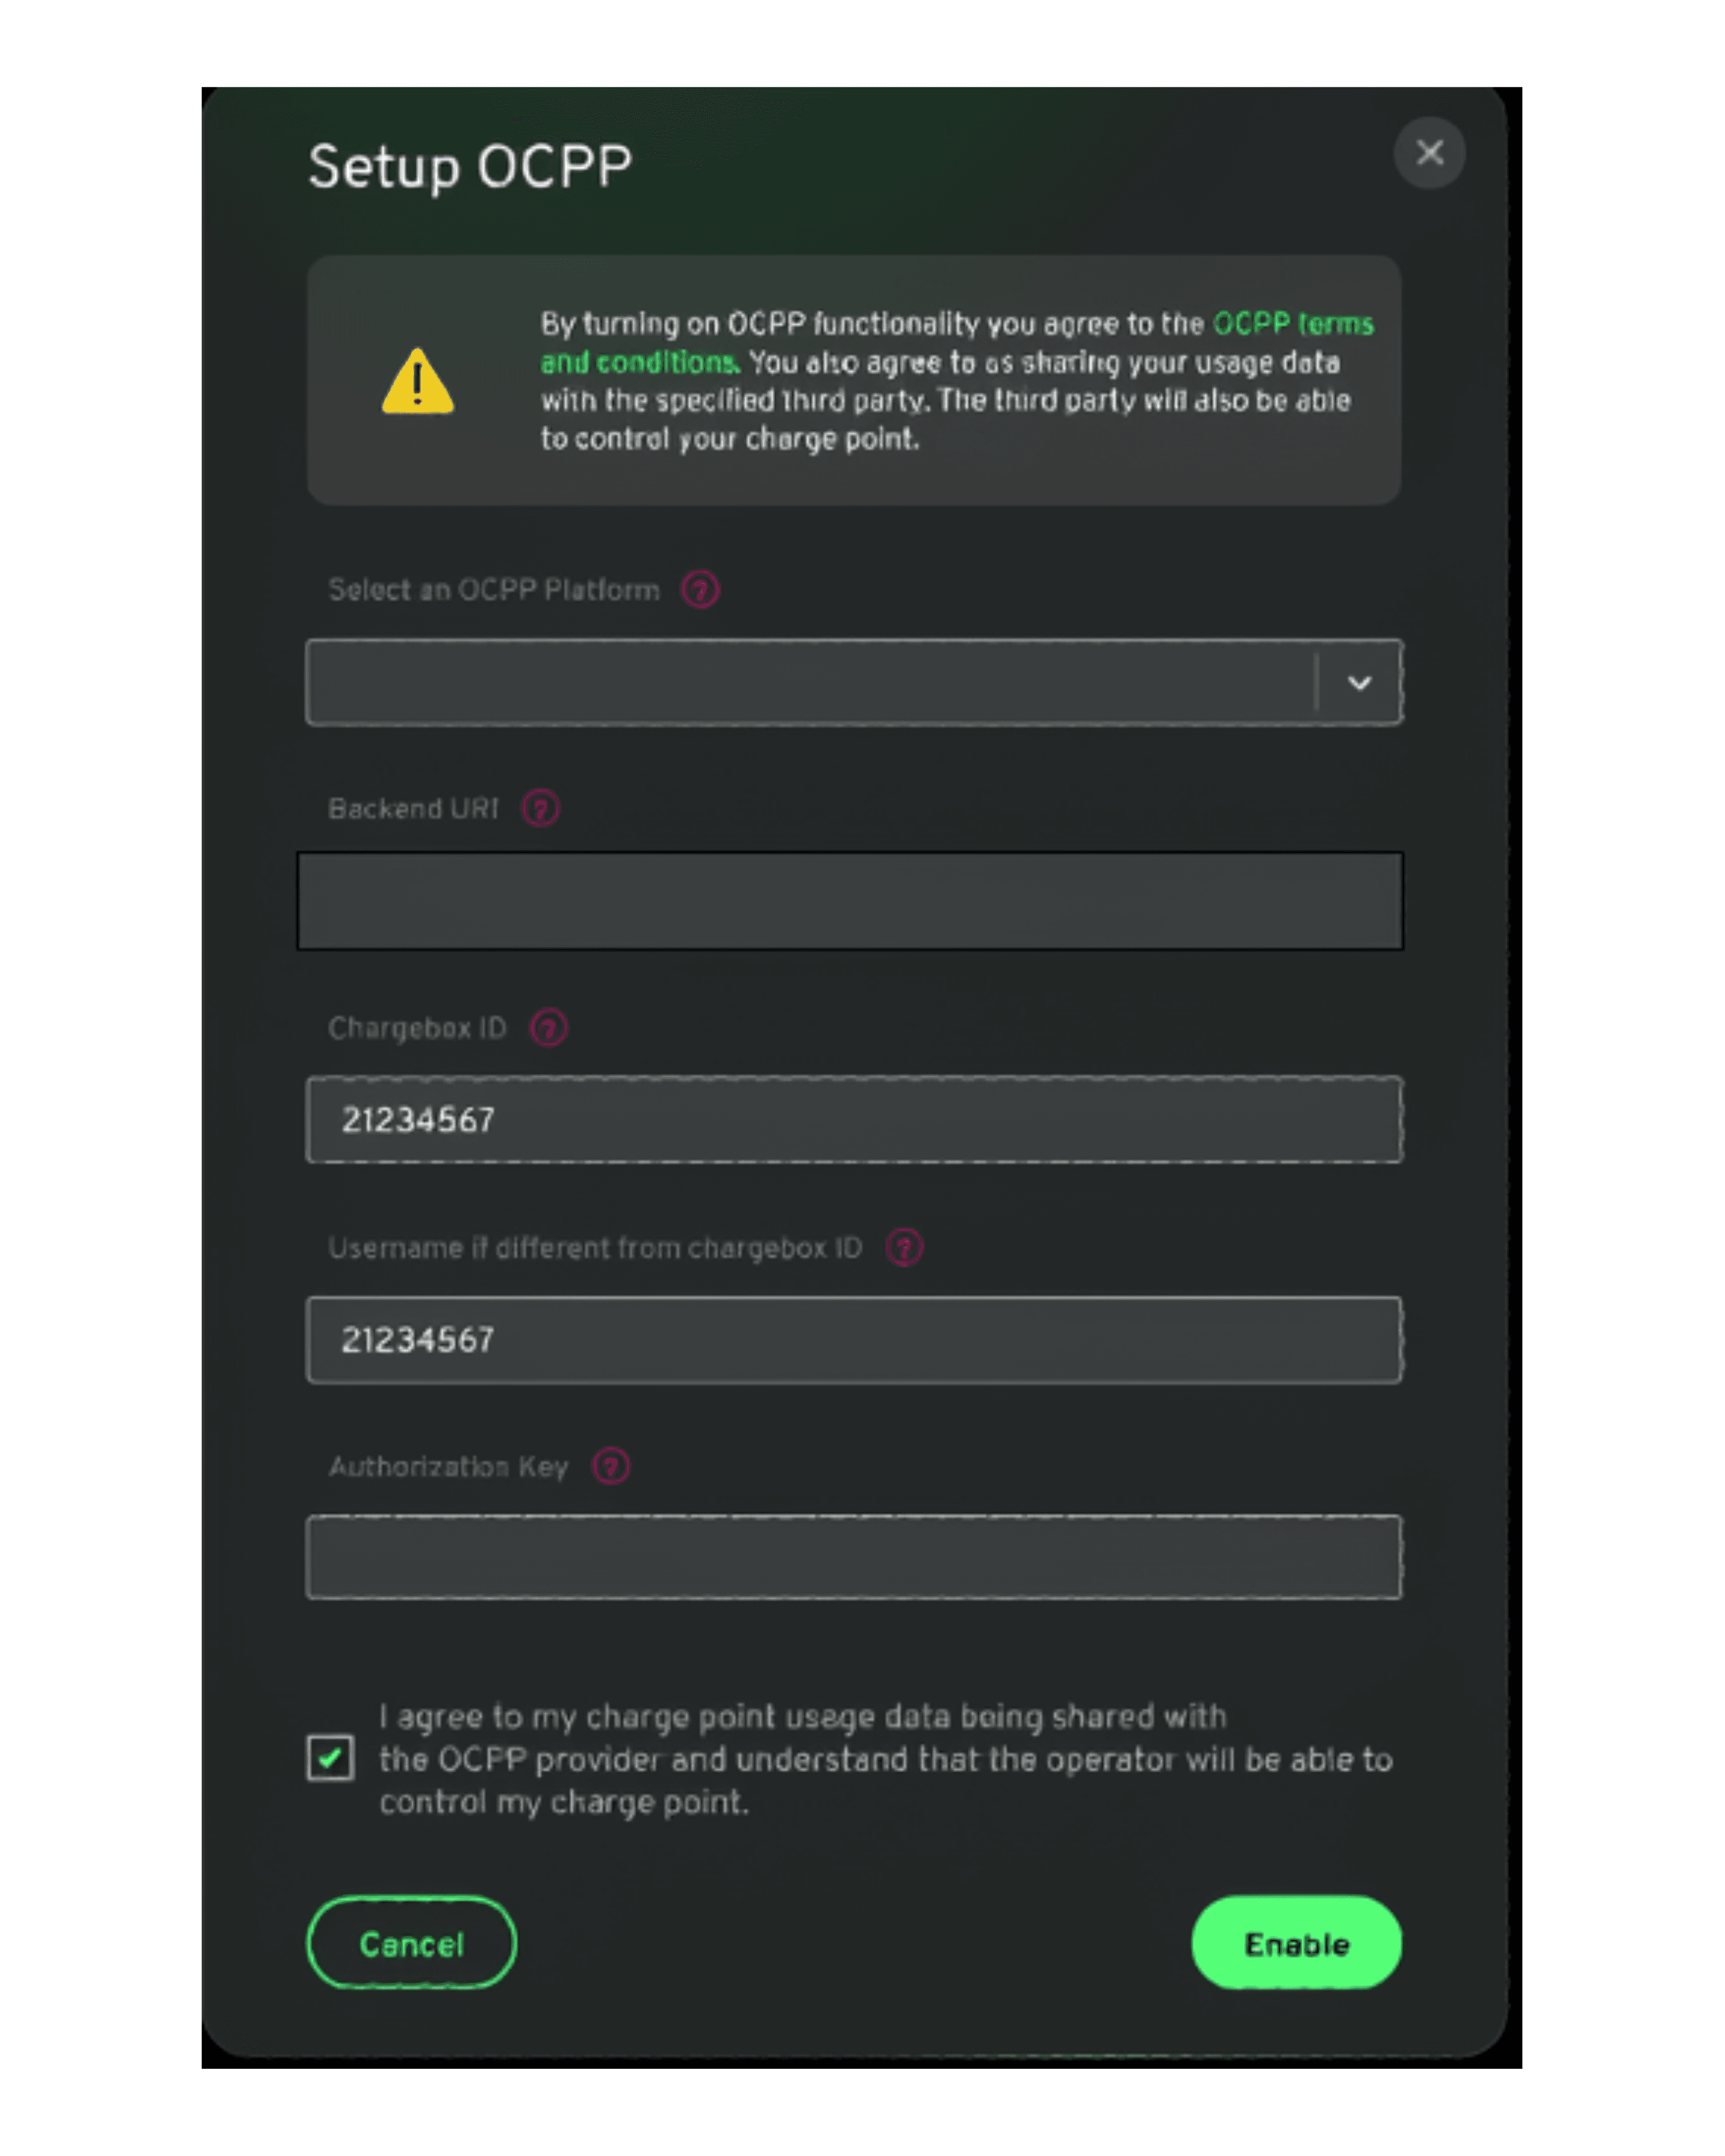
Click Enable, then Save.
Click the "Enable" button to activate the OCPP connection, then click Save to apply the configuration.
Open Splash Share.
Go to My chargers → Tap "Add new charger"

Enter your charger ID.
Enter your serial number to proceed.

Set up your charger.
Follow the instructions to finish setting up your charger. After a minute, it should appear on the map. Until your Splash QR sticker is on the charger, guests can't actually use it — that's how they start a session. Send us a screenshot of your charger on the map via the "Need help?" link below, and we'll get a sticker in the post to you.
