1. Turn on the Vestel charger.
2. Connect your laptop or mobile device to the charger’s wifi.
Wifi network name: Serial number of the charger
Password: Chargebox-ID
3. Open a web browser on your laptop or phone. Enter the charger’s IP as the browser URL.
IP: 192.168.1.1
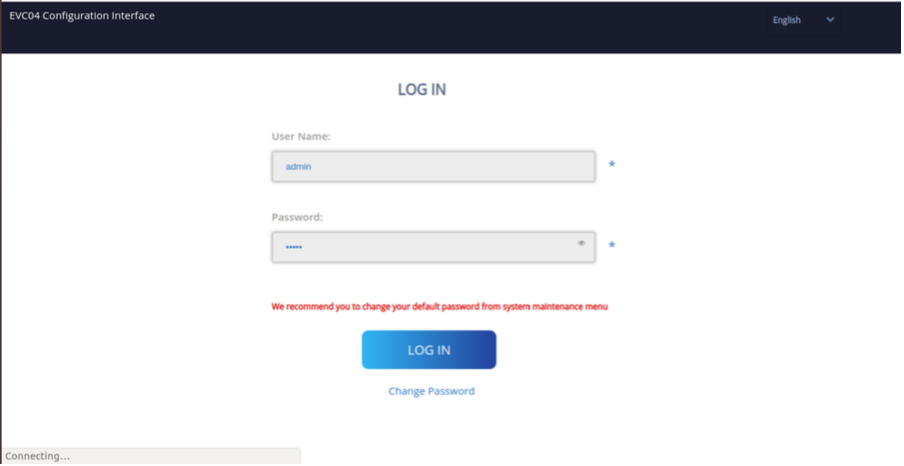
4. Login using the following credentials.
User Name: admin
Password: admin
5. You are now in the configuration interface. Change OCPP Connection from Disabled to Enabled. OCPP Version should stay as OCPP 1.6.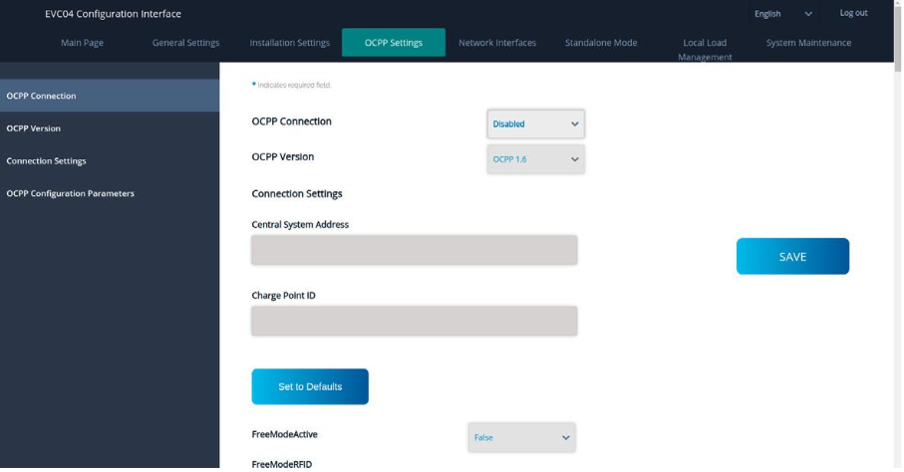
7. In Central System Address, paste the URL you copied from Splash.
8. In Charge Point ID, enter your desired charger ID.
9. Set AuthorizeCacheEnabled to True. This can improve the offline performance of you charger, as it will allow it to store valid tokens in case the charger goes offline.
10. Click Save.


